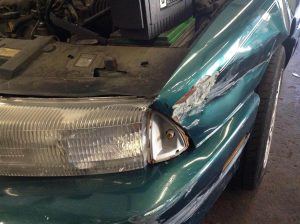
How to Change a Broken Headlight
 Driving without two functioning headlights isn’t just dangerous-- it’s illegal. Thankfully, a headlight replacement is fairly easy to do yourself if you know how. In this article and we’ll walk you through the process:
Identify Your Bulb Type
First, it’s important to identify both the correct bulb type and wattage so you buy a replacement. You can usually find either a graph or chart identifying the bulb wattage and bulb number in your owner’s manual. There are also several online tools that can help you find the bulb specifications for your vehicle's make, model, and year.Get the Right Tools for the Job
You won’t need any high-tech tools to change a headlight bulb but you should make sure that you have a couple of things handy:- Your vehicle’s owner's manual: Your owner's manual will have more than just the type of bulb you will need. It should also have a guide that shows you where your bulb is located and tells you how to switch out your headlight.
- Screwdriver: Some newer cars don't use screws to hold the parts in place, you may need one for an older vehicle.
- Rubbing alcohol or alcohol wipes: These aren’t a necessity, but you'll want them to wipe the surface of the light bulb clean in case you touch it.
- Safety glasses: Again these aren't absolutely necessary, but they're always a good idea to keep yourself safe.
Follow the Steps
Once you're ready, follow the steps in your owner’s manual:- You’ll want to start by popping your hood and propping it up. Before you start working, remove the power connector from the headlight and the dust cover from the back of the headlight. You may need to give them a slight turn to get them loose.
- Some cars have a headlamp that is encased or difficult to access. In that case, it’s best to stop here and let a mechanic take over. If your car doesn’t have this, it probably just has a clip that holds the bulb in place, and you must press down gently on this clip to release the light bulb.
- Grab the housing of the bulb and carefully pull it out. You may have to wiggle it from side to side to get it loose. Do not pull the bulb by the glass or tug the bulb roughly-- this could cause it to break.
- Take a minute to inspect the bulbs. Hold the old one and the new one by their housings and compare to make sure they match. If they are, toss the old one out and wipe the new one with pre-moistened alcohol wipe or rubbing alcohol on a dust-free cloth. This will guarantee your bulb is free of dust and fingerprints,
- Line up the bulb housing with the open socket. Carefully push or screw it in and make sure it's secure.
- Slide the headlight back in the socket and twist if necessary to make sure it's locked into its spot.
- Replace the clip (if you have one), dust cover, and power connector.
- Before you finish, give the bulb a quick test. Turn on your headlights to ensure the bulb and connection are working. If not, check the connections, or take the bulb out and put it in again. If it’s still not working, you’ll need to have your car inspected by a mechanic for an electrical problem.
- Close the hood and you’re done!
